Generative AI Model Management
This section provides a comprehensive guide to managing Generative AI models within our platform. You'll learn about their definition, creation process, version management, and testing procedures. The platform offers three distinct tabs for AI model management: Models, Gen AI, and API Service Configurations, with Models being the default view.
In the following sections, details about adding a Gen AI model, versions, etc. will be given.
Understanding the Interface
When you first access the AI Models page without any existing models, you'll see an empty dashboard as shown below:
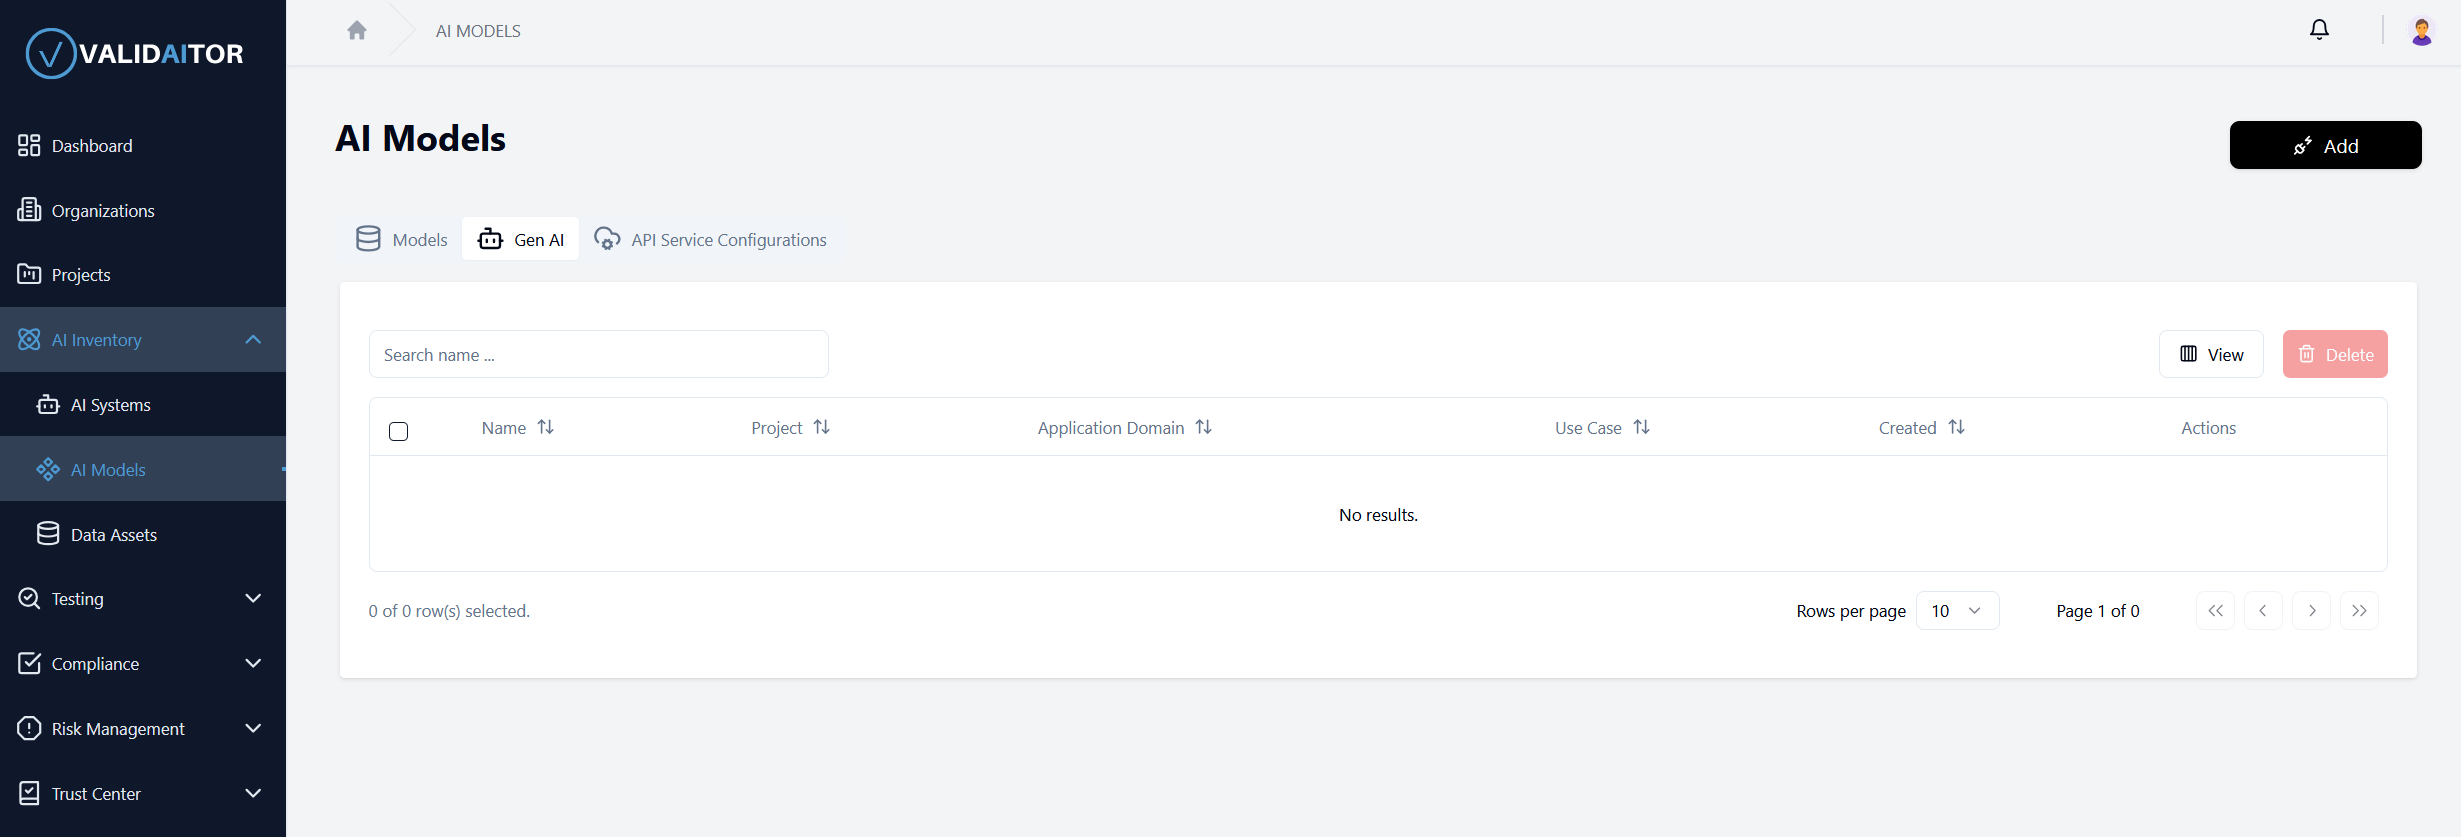
The interface is designed to provide a clear overview of all your Gen AI models and facilitate easy management of their lifecycle.
Creating a New Gen AI Model
To begin creating your first Gen AI model:
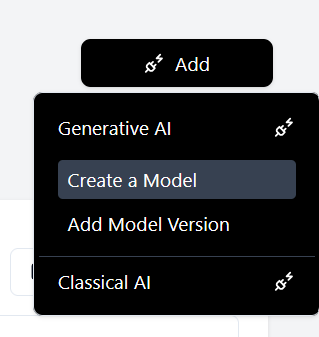
Locate and click the Add button positioned in the top-right corner of the page
-
A dropdown menu will appear with two main categories:
- Generative AI: For models that generate new content (text, images, etc.)
- Classical AI: For traditional machine learning models (classification, regression, etc.)
-
Select Generative AI to reveal additional options
-
Click the Create a Model button from the expanded menu
-
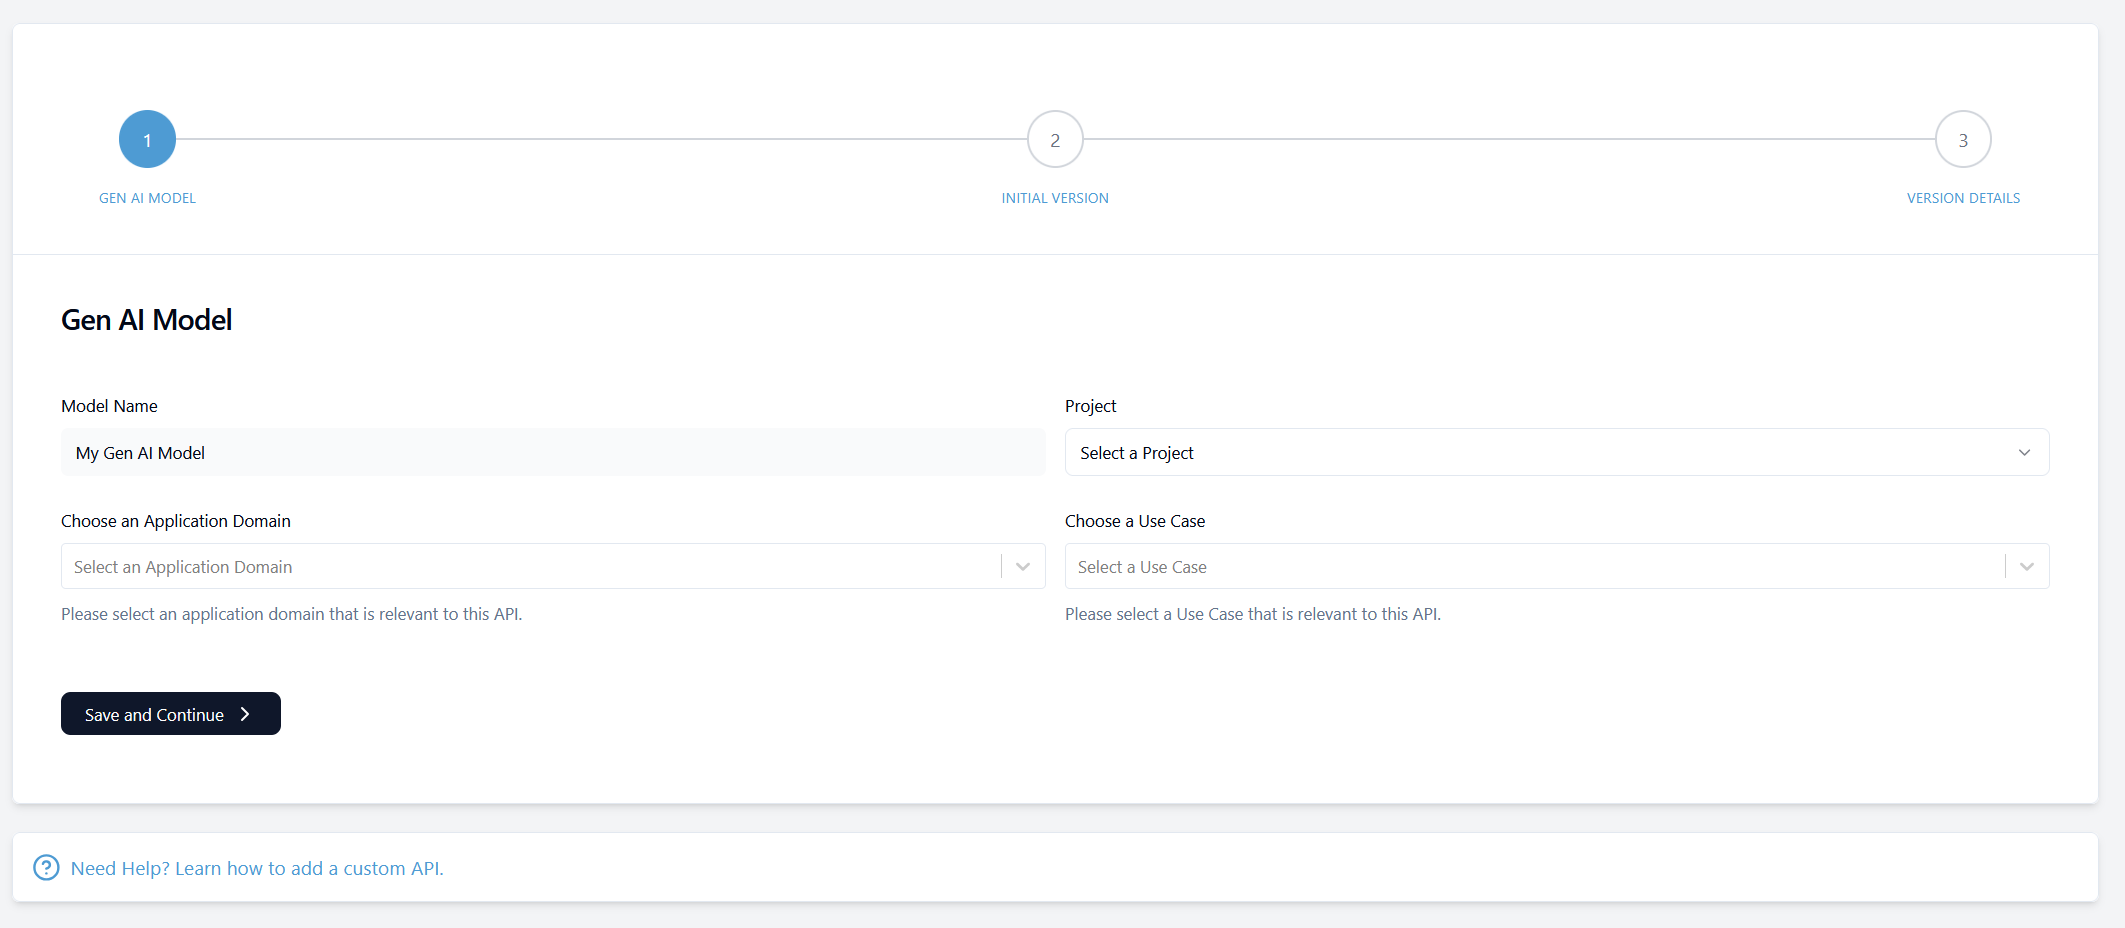
A multi-step form will appear. Complete the model form with the required information and create your initial version.
-
First, provide a name for your model and select Project, Application Domain and Use Case.
-
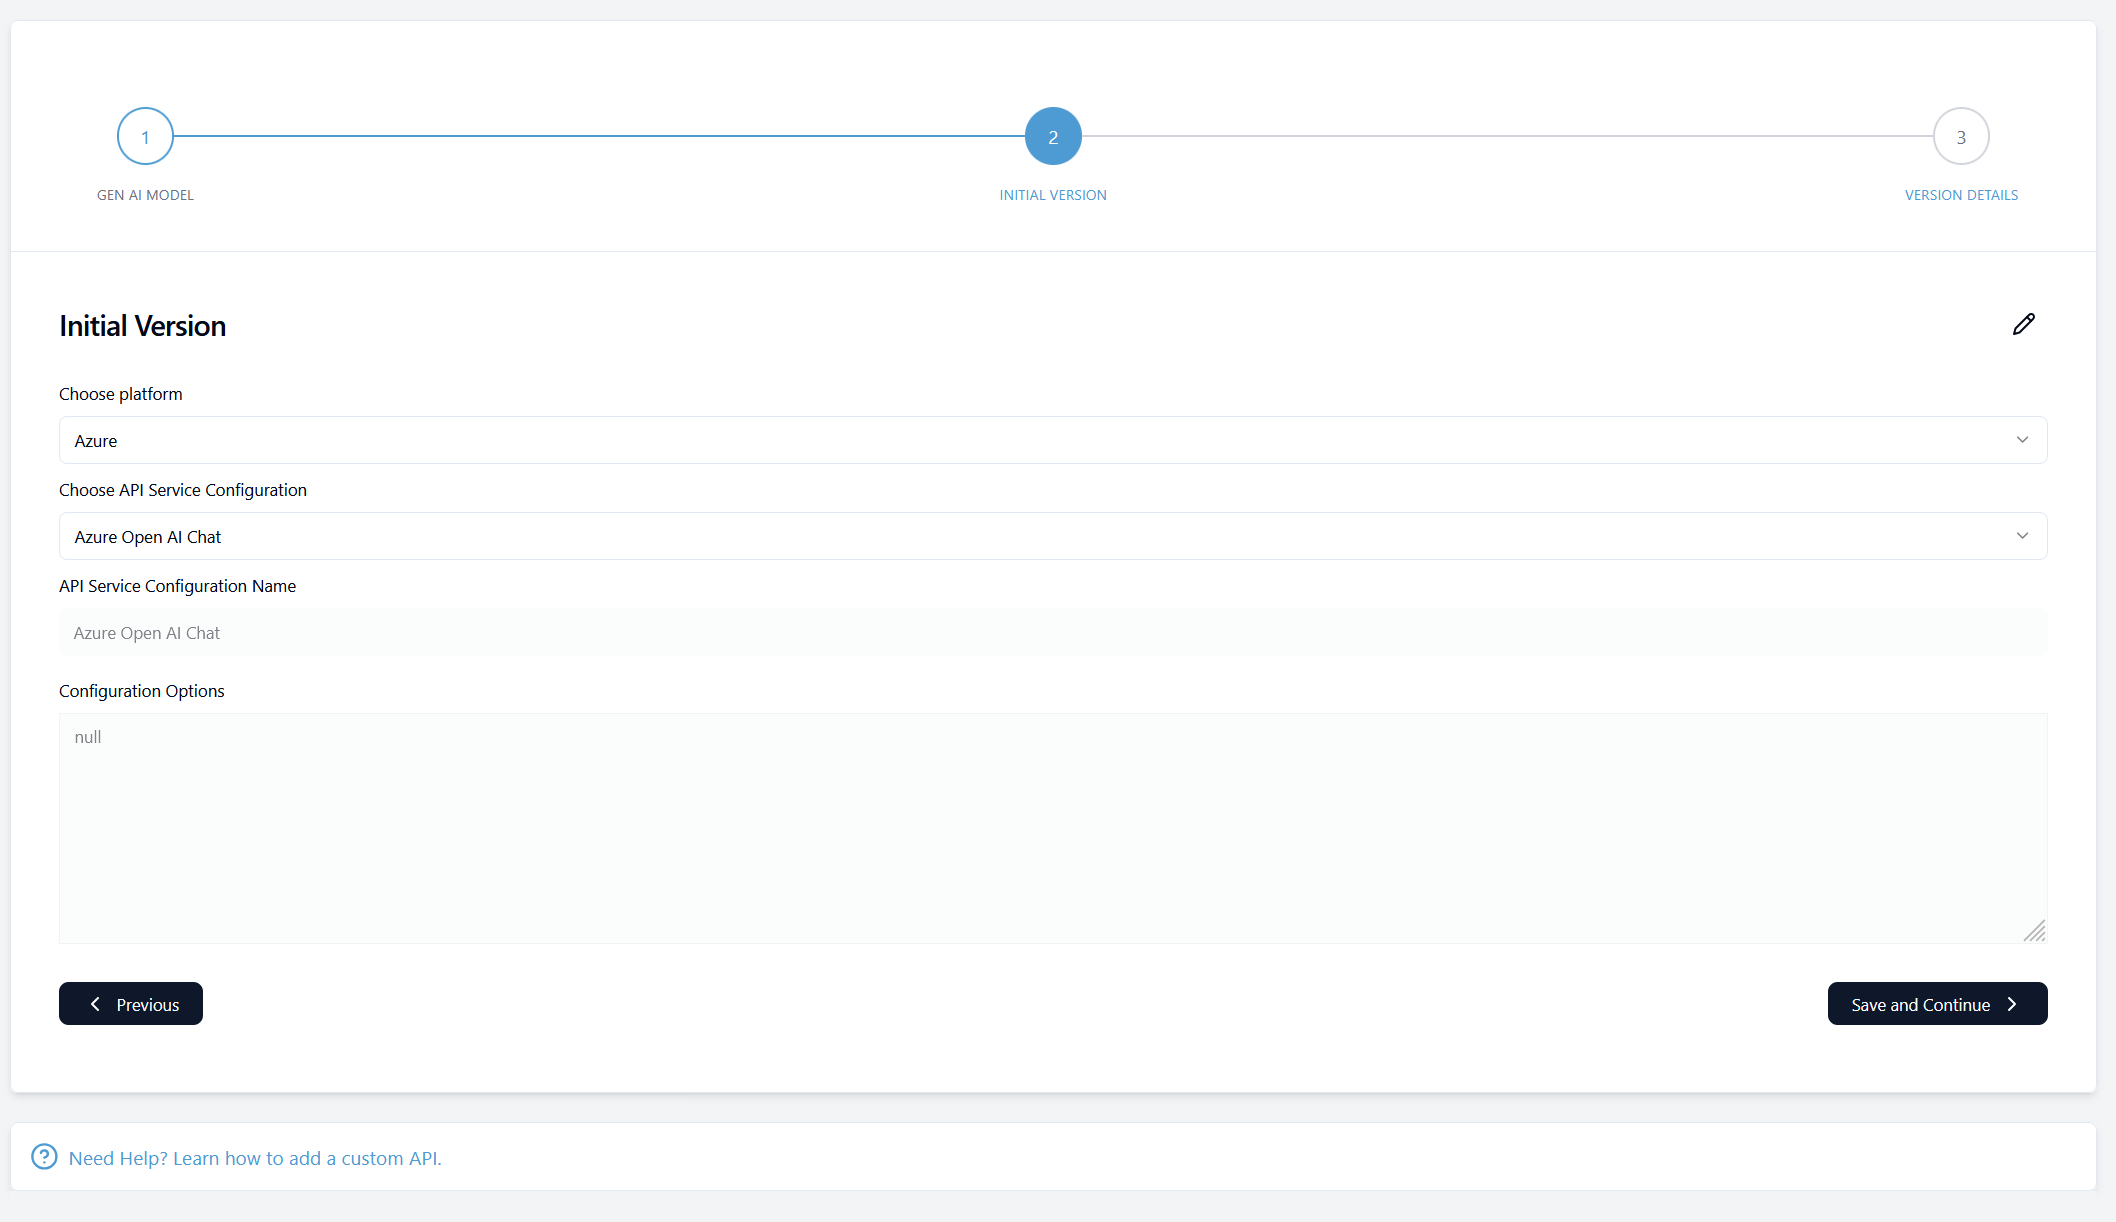
Create an initial version of your model. Select a Platform and a API Service Configuration. You can select one of the options or create your costum configuration.
-
Add the Version Details. API Url and API Token are required.
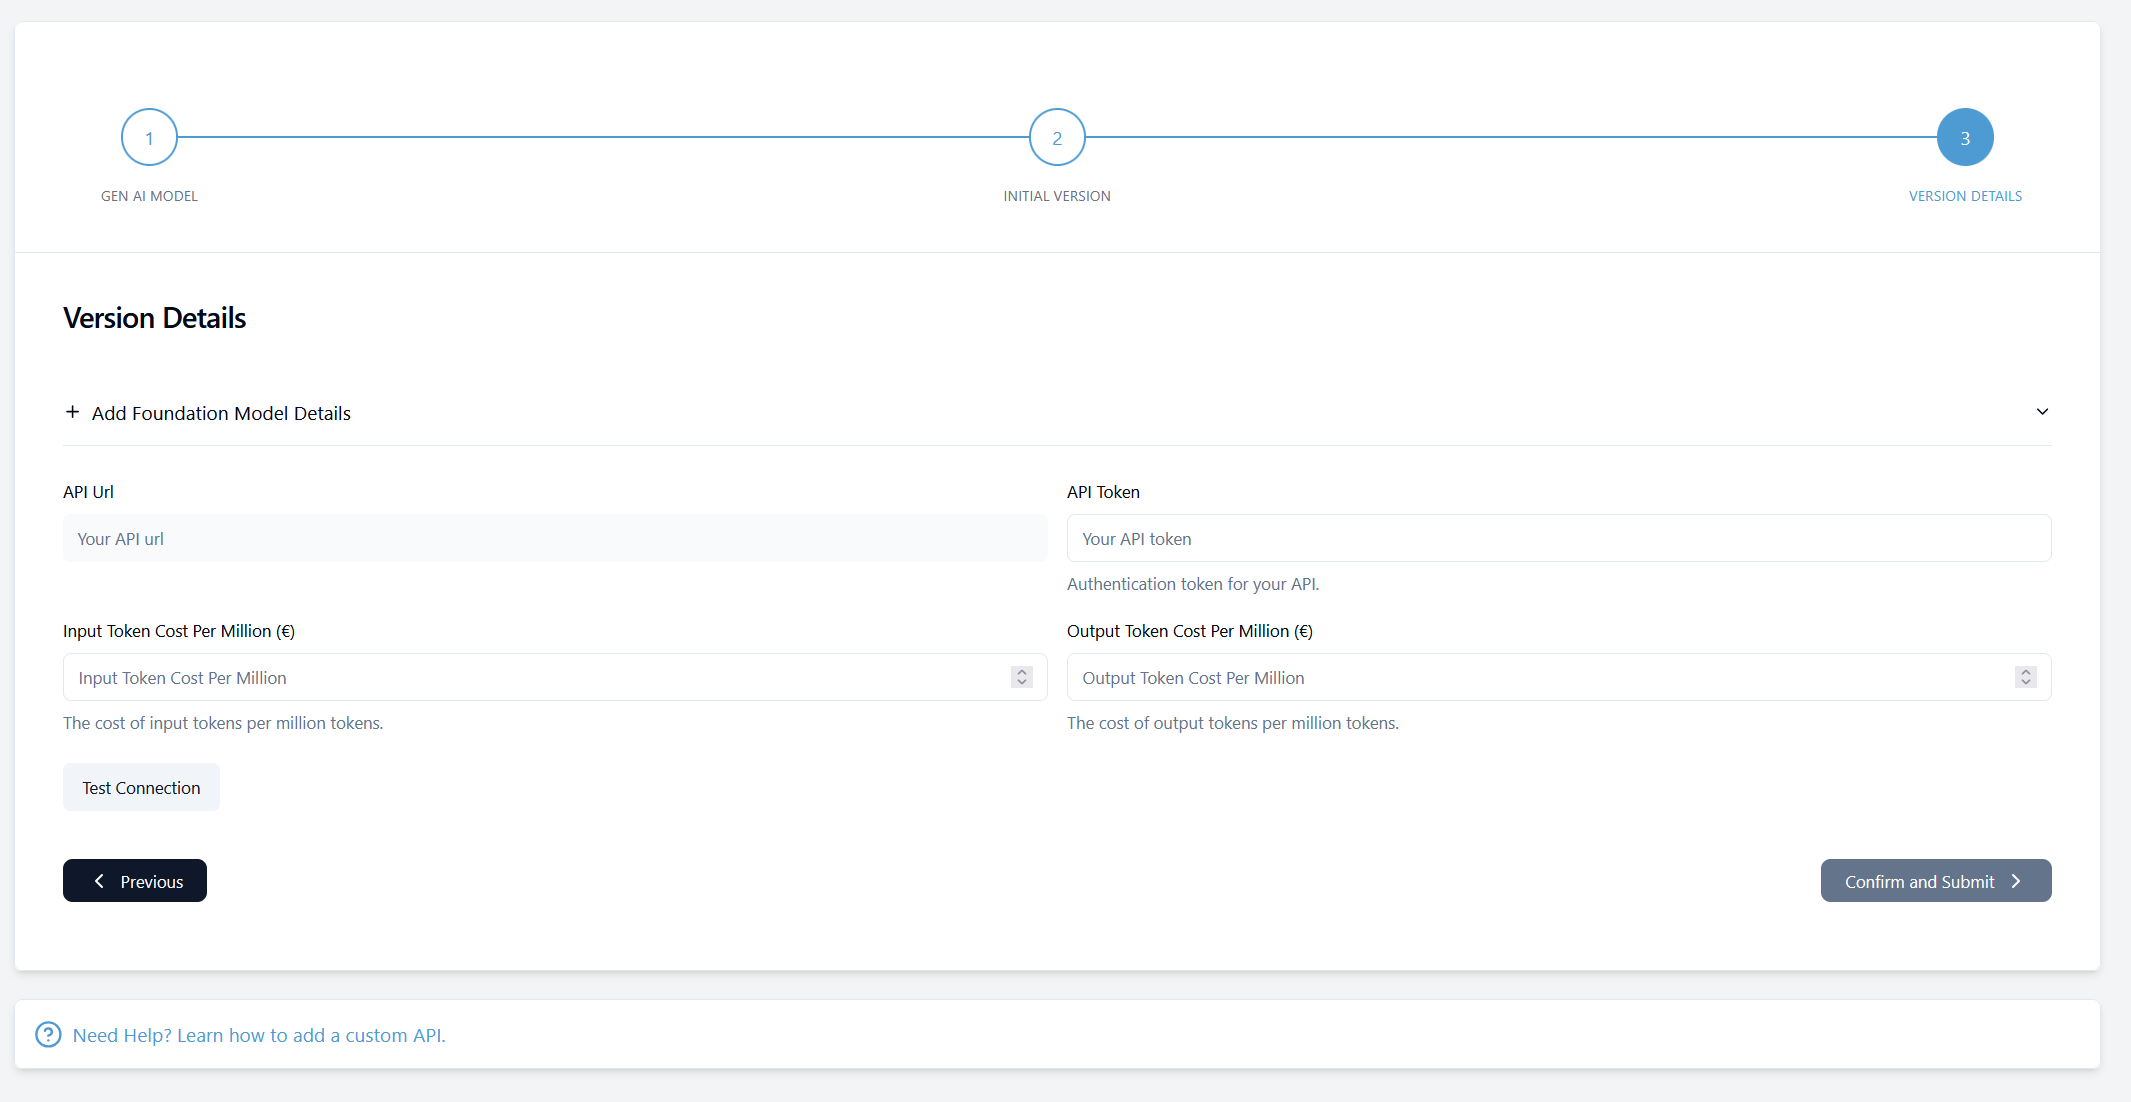
-
After filling out all necessary fields, click the
Test Connectionbutton. If the test was successful, you can create the model and an initial version by clickingConfirm and Submit.
Once created, your model serves as a container that can hold multiple versions, allowing you to track the evolution of your AI solution over time.
Custom Connections
For some test cases it is necessary to configure a custom connection. You can define configurations, request templates and response templates for your API connection. Just select Create new API Service Configuration when you create a new version.
Some extra steps are added to the model/ version creation process:
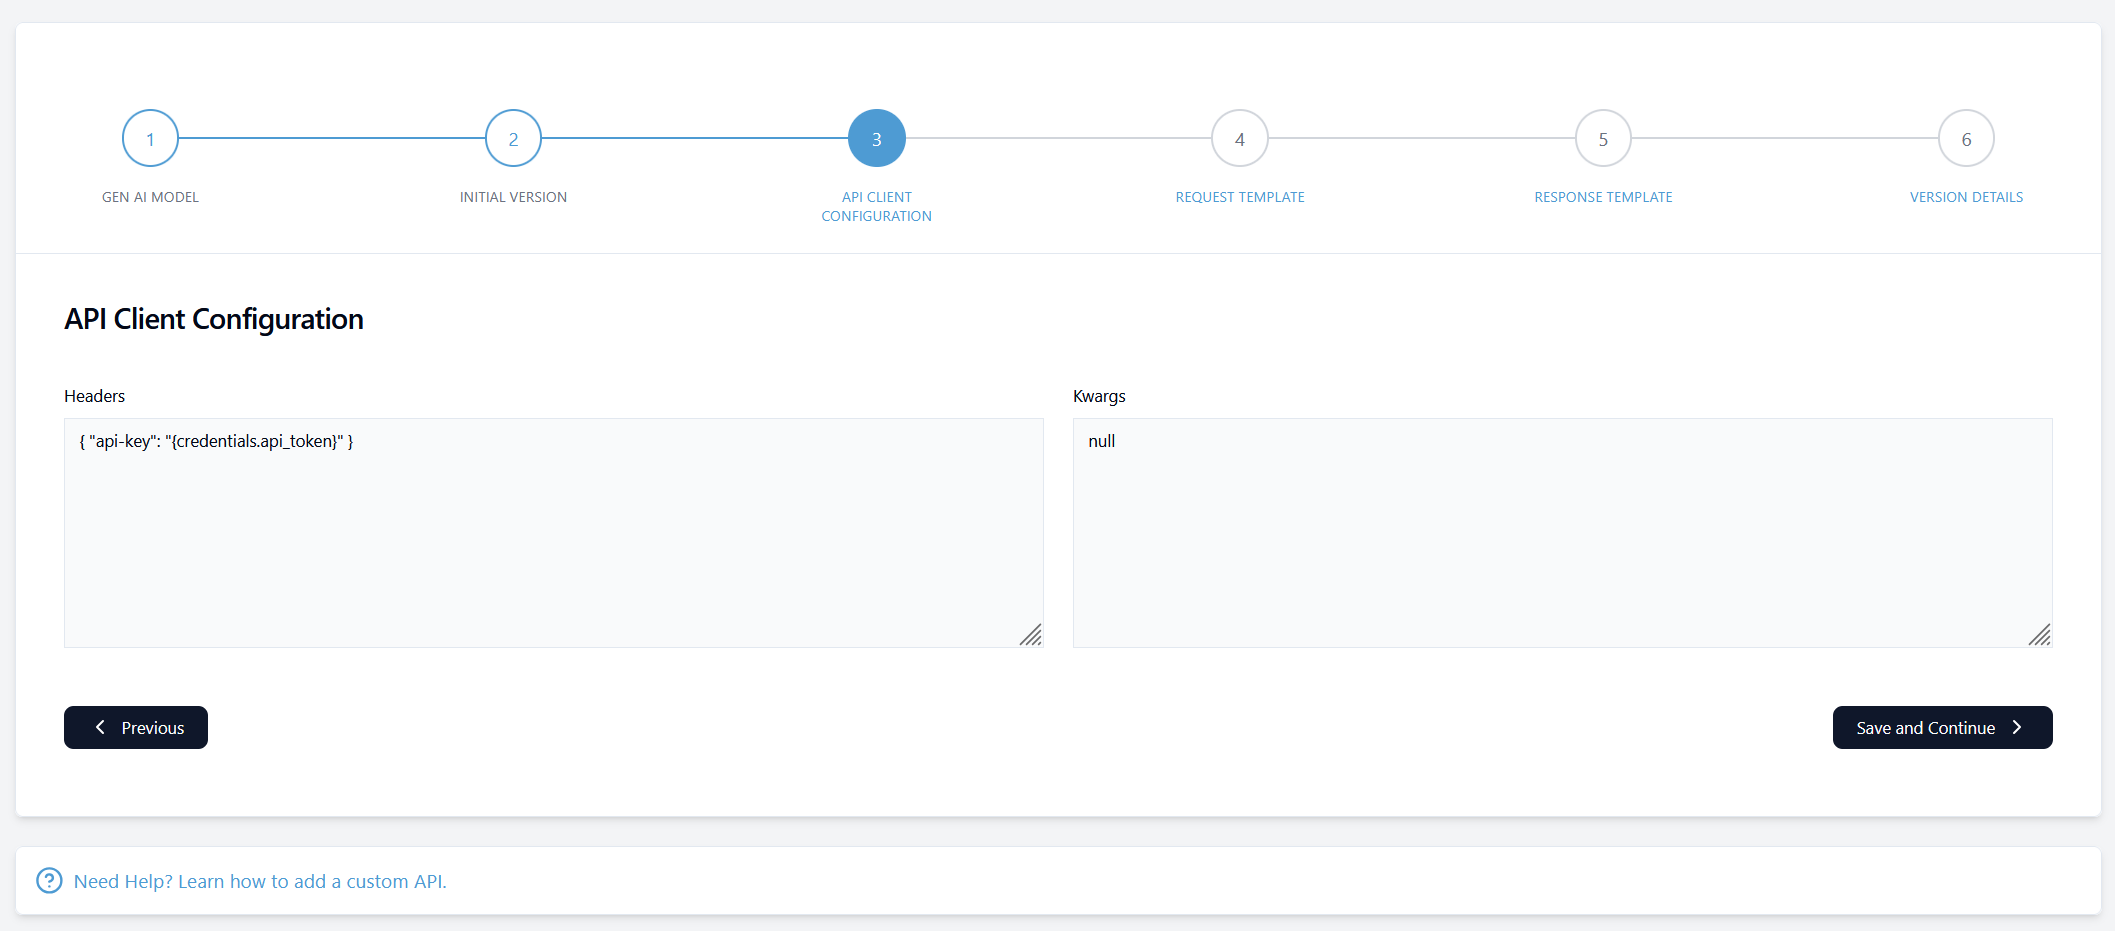
-
Define the API Client Configuration. Add Headers and Kwargs.
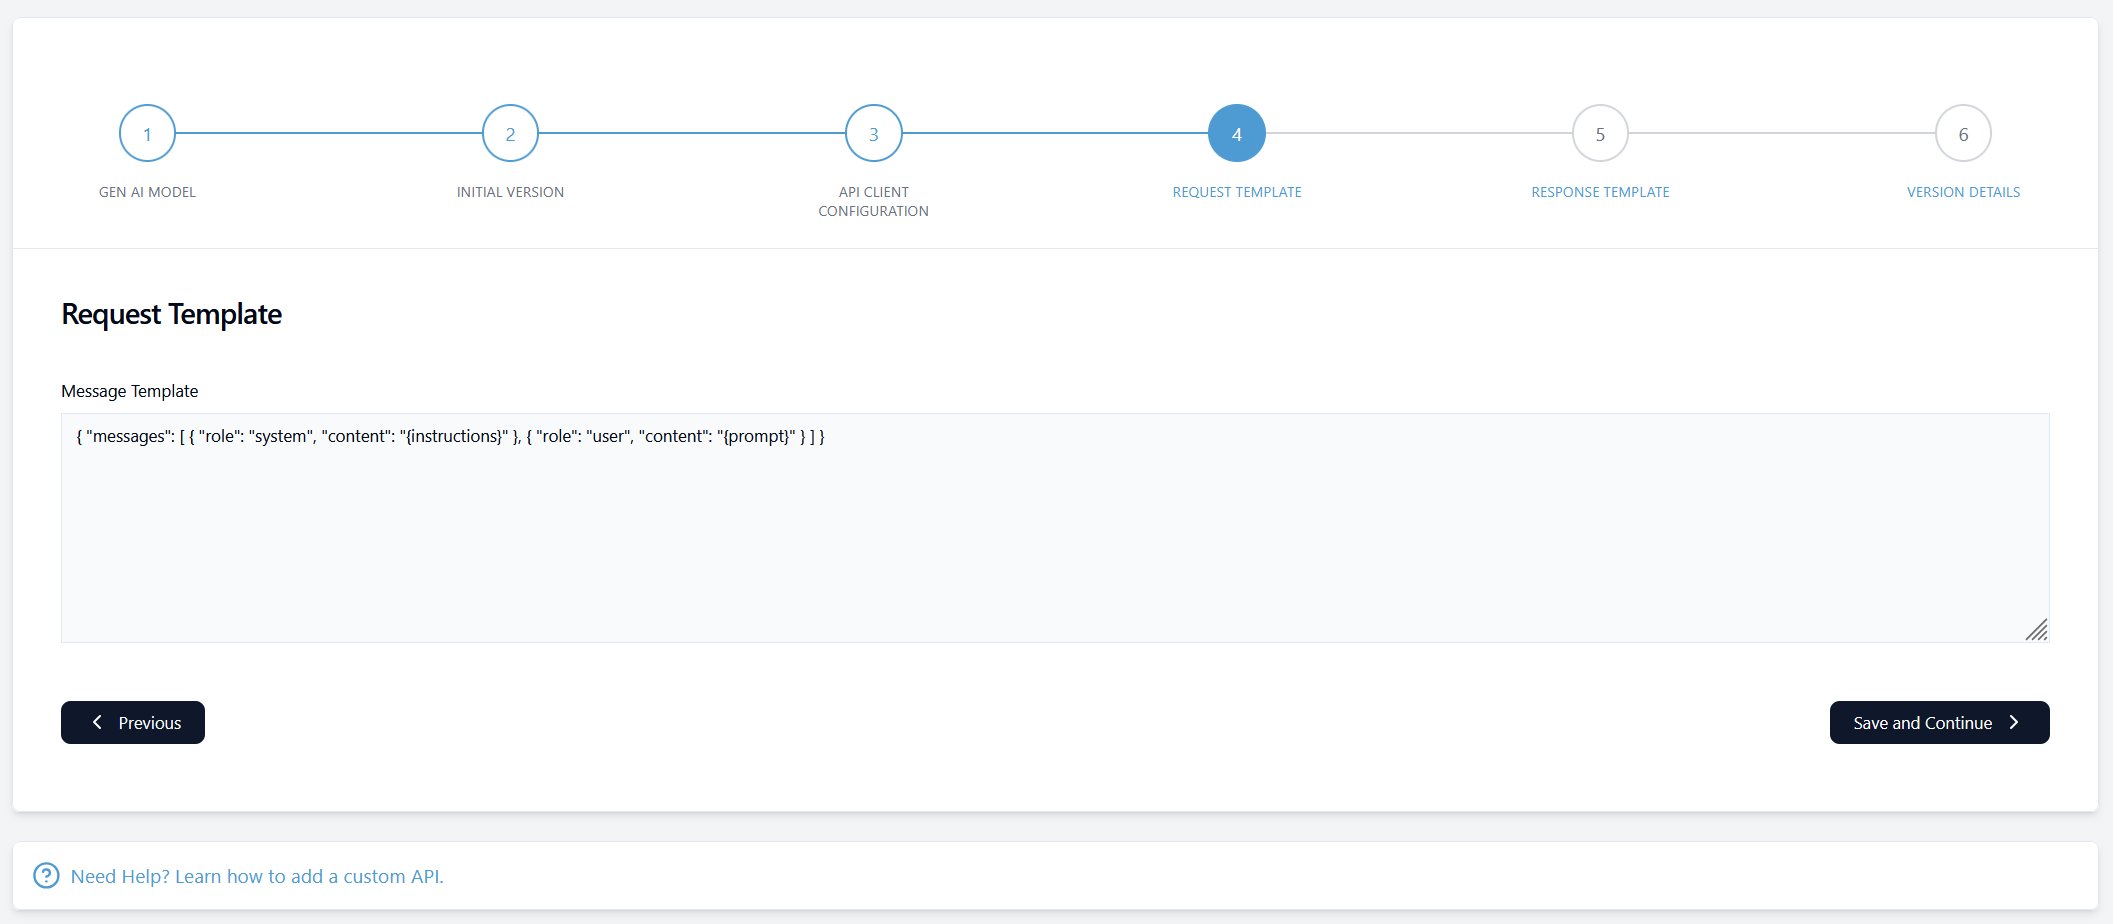
-
Define the paths and keys for the Request Template.
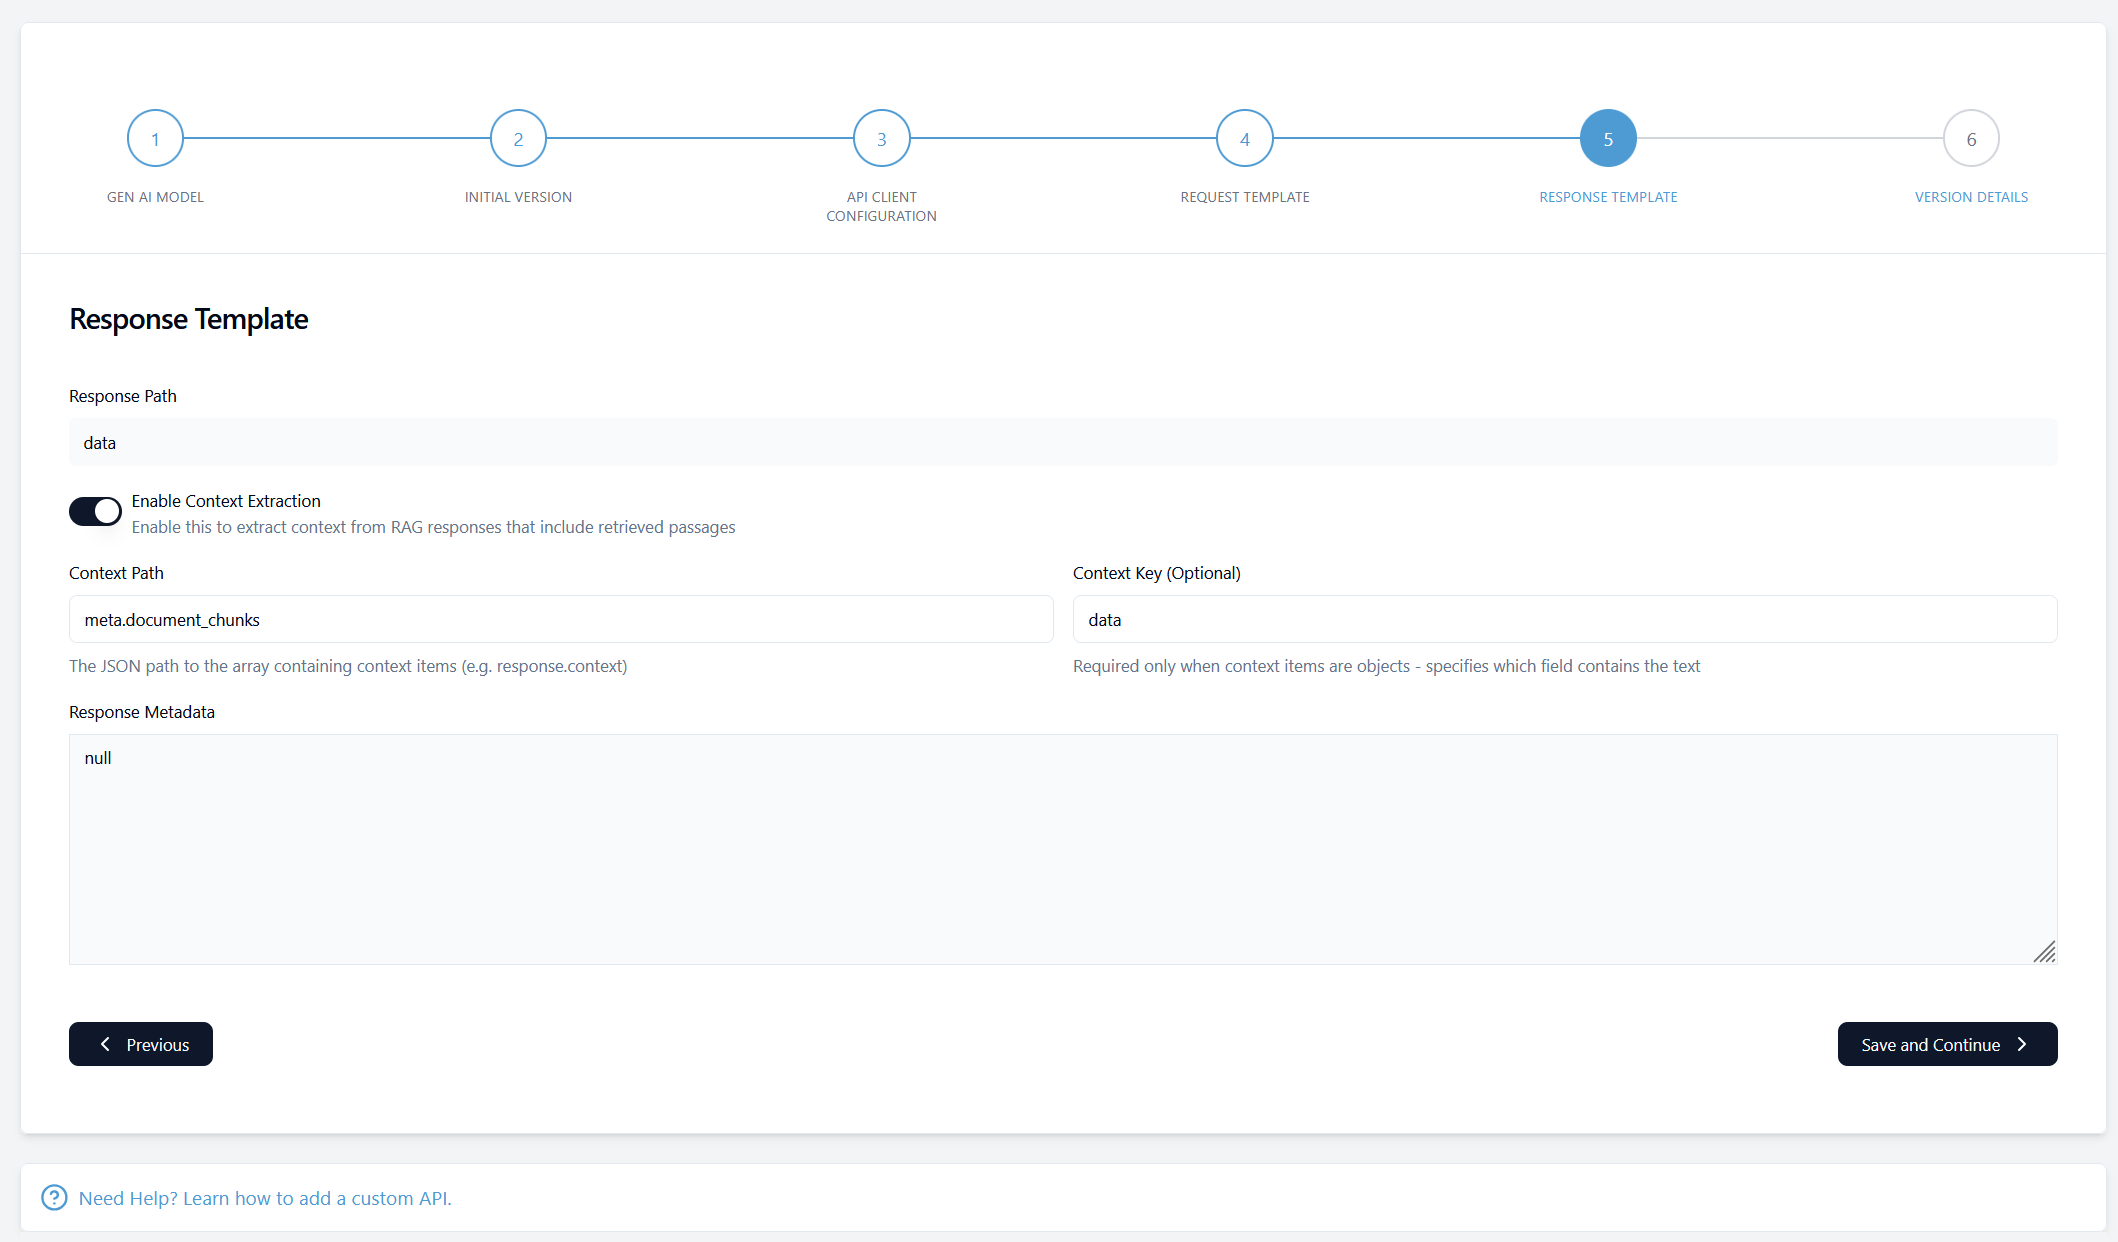
-
Define the Response Template. The Response Path provides the path to the model response. Context Extraction can be enabled for RAG testing. Then additional keys for the context are required.
Managing Gen AI Models
After successfully creating a Gen AI model, it will appear in the models table:
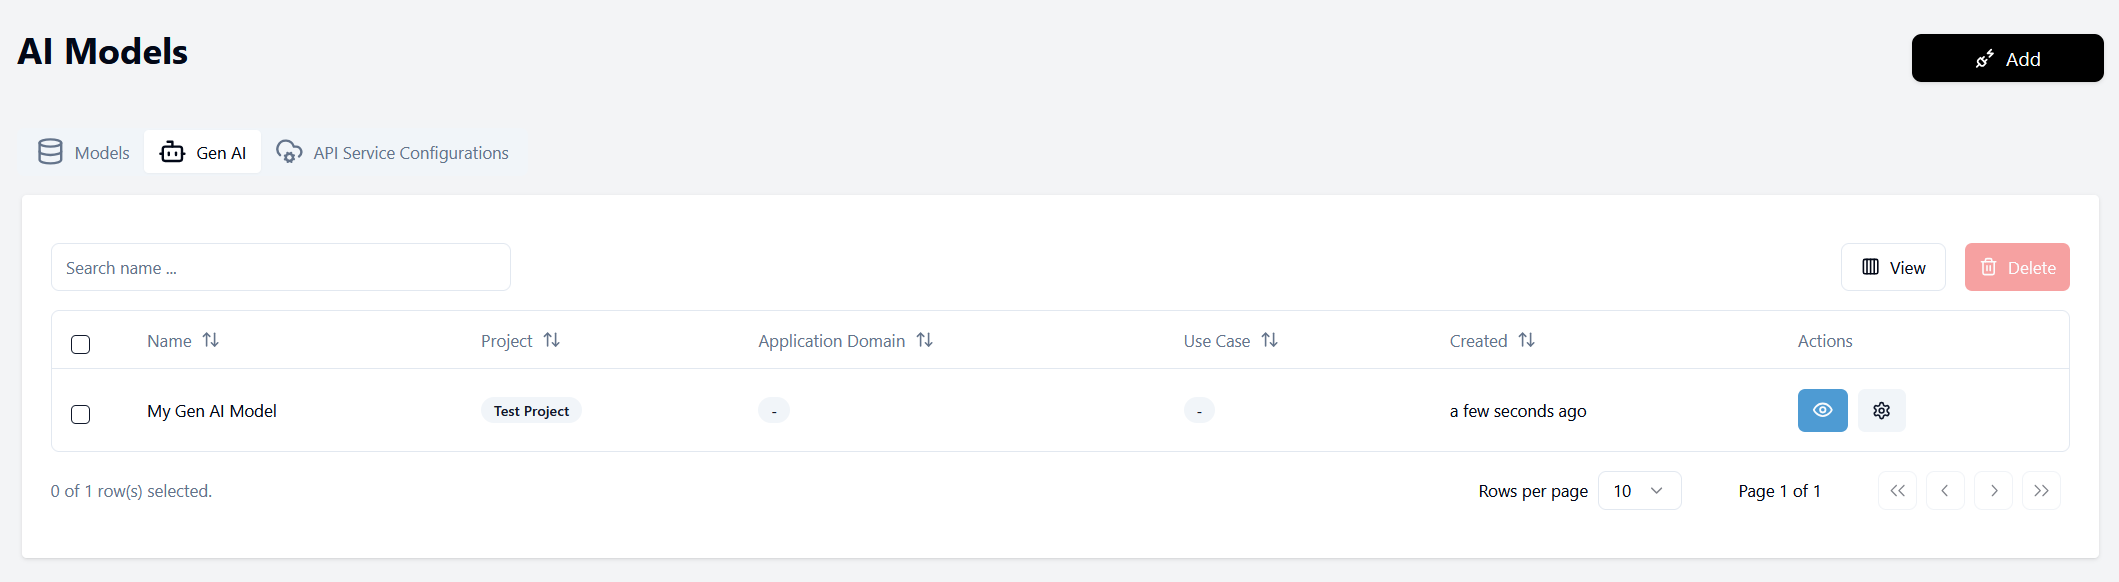
Each model entry in the table provides several interaction options:
- Eye icon: View detailed information about the Gen AI model and its versions
- Settings icon: Update this specific Gen AI model
Adding Gen AI Model Versions
To create and add a version to your AI model, you have two options:
- Select Generative AI and Add Model Version from the dropdown menu in the top-right corner
- Go to the Versions tab in the model page and click on Add Version.
Both options will direct you to the version creation page.
Creating a Gen AI Model Version
In the Create Version page you first select the model that you want to use. Then you can decide if you want to define a new configuration or reuse an existing one. If you use an existing configuration, you select a model version.
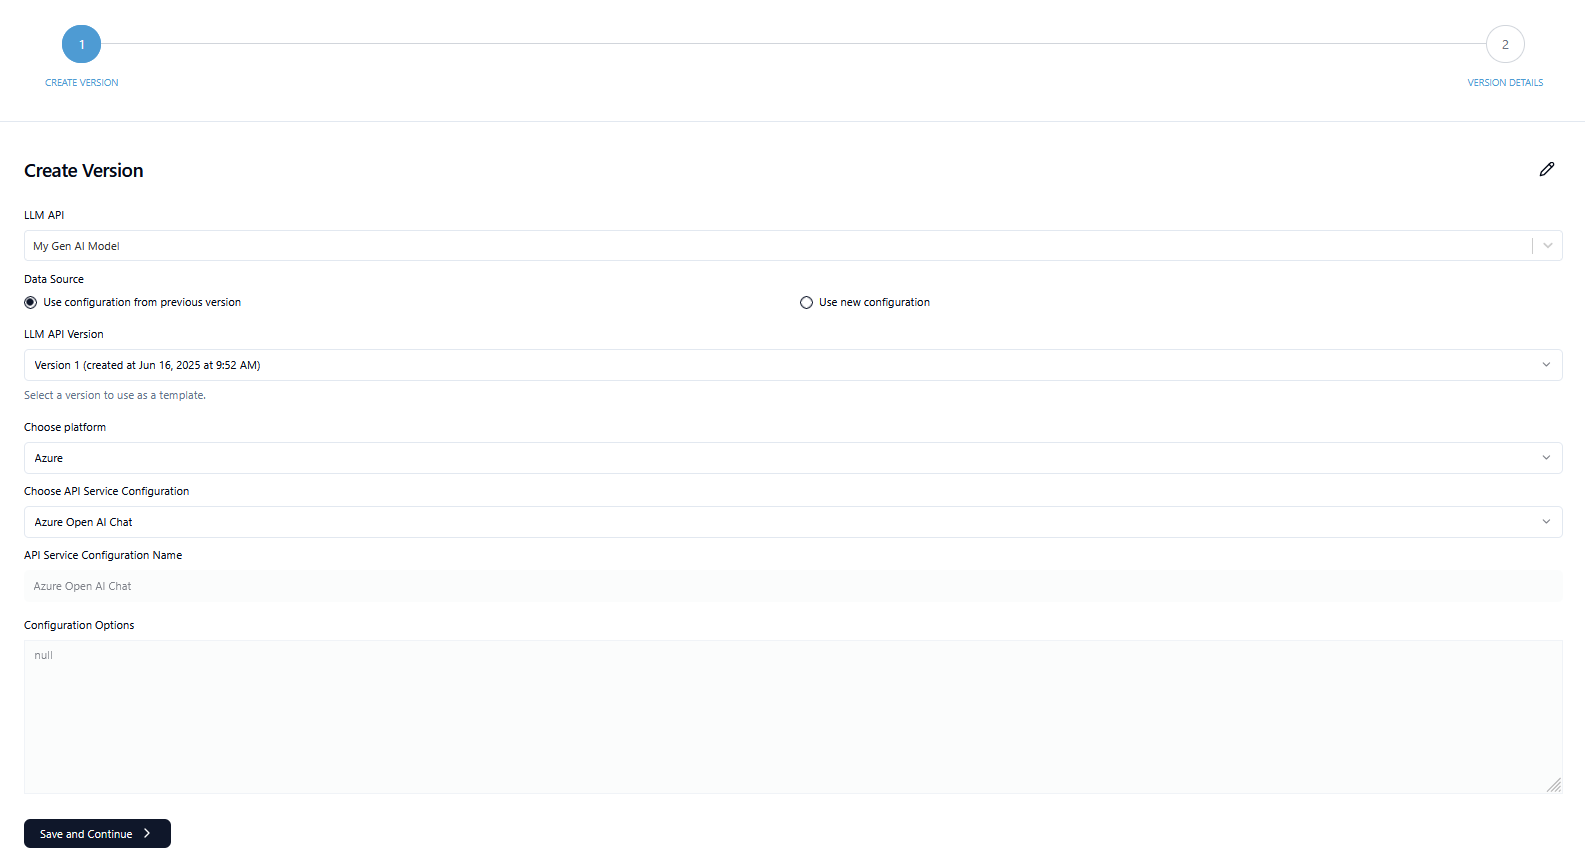
If you want to create a new API Service Configuration, additional steps for client configuration, request template and response templates will be added.
In the Version Details you can add API Url and API Token. If you reuse an existing configuration, you can also reuse the credentials from a previous version. After filling out all necessary fields, click the Test Connection button. If the test was successful, you can create the model version by clicking Confirm and Submit.
Gen AI Model Overview
You can access the the Gen AI Model page e.g. from the Gen AI table in AI Models. The Overview tab provides comprehensive information about your models performance across different evaluation categories and versions:
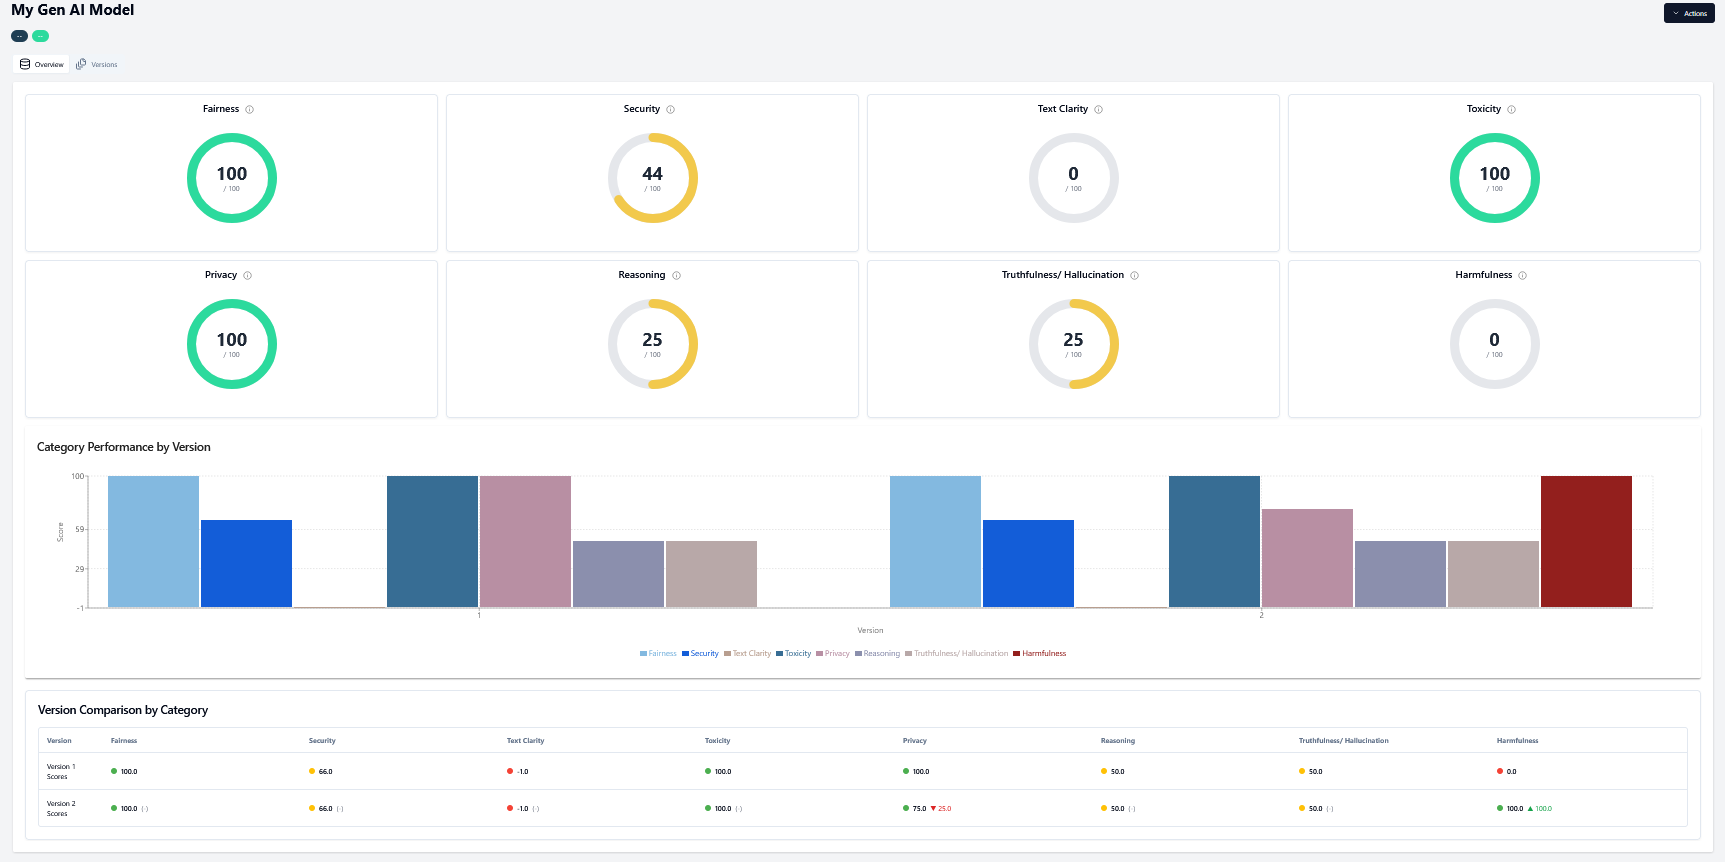
This dashboard includes:
- Visualizations of different category scores
- Comparison between different versions
- Performance changes in comparion to previous versions
You can use the button at the top right (Latest Tests in the above image) to modify the dashboard according to the latest, overall, or a specific time frame tests.
If you've just created the model version and haven't run any tests yet, this page will initially appear empty.
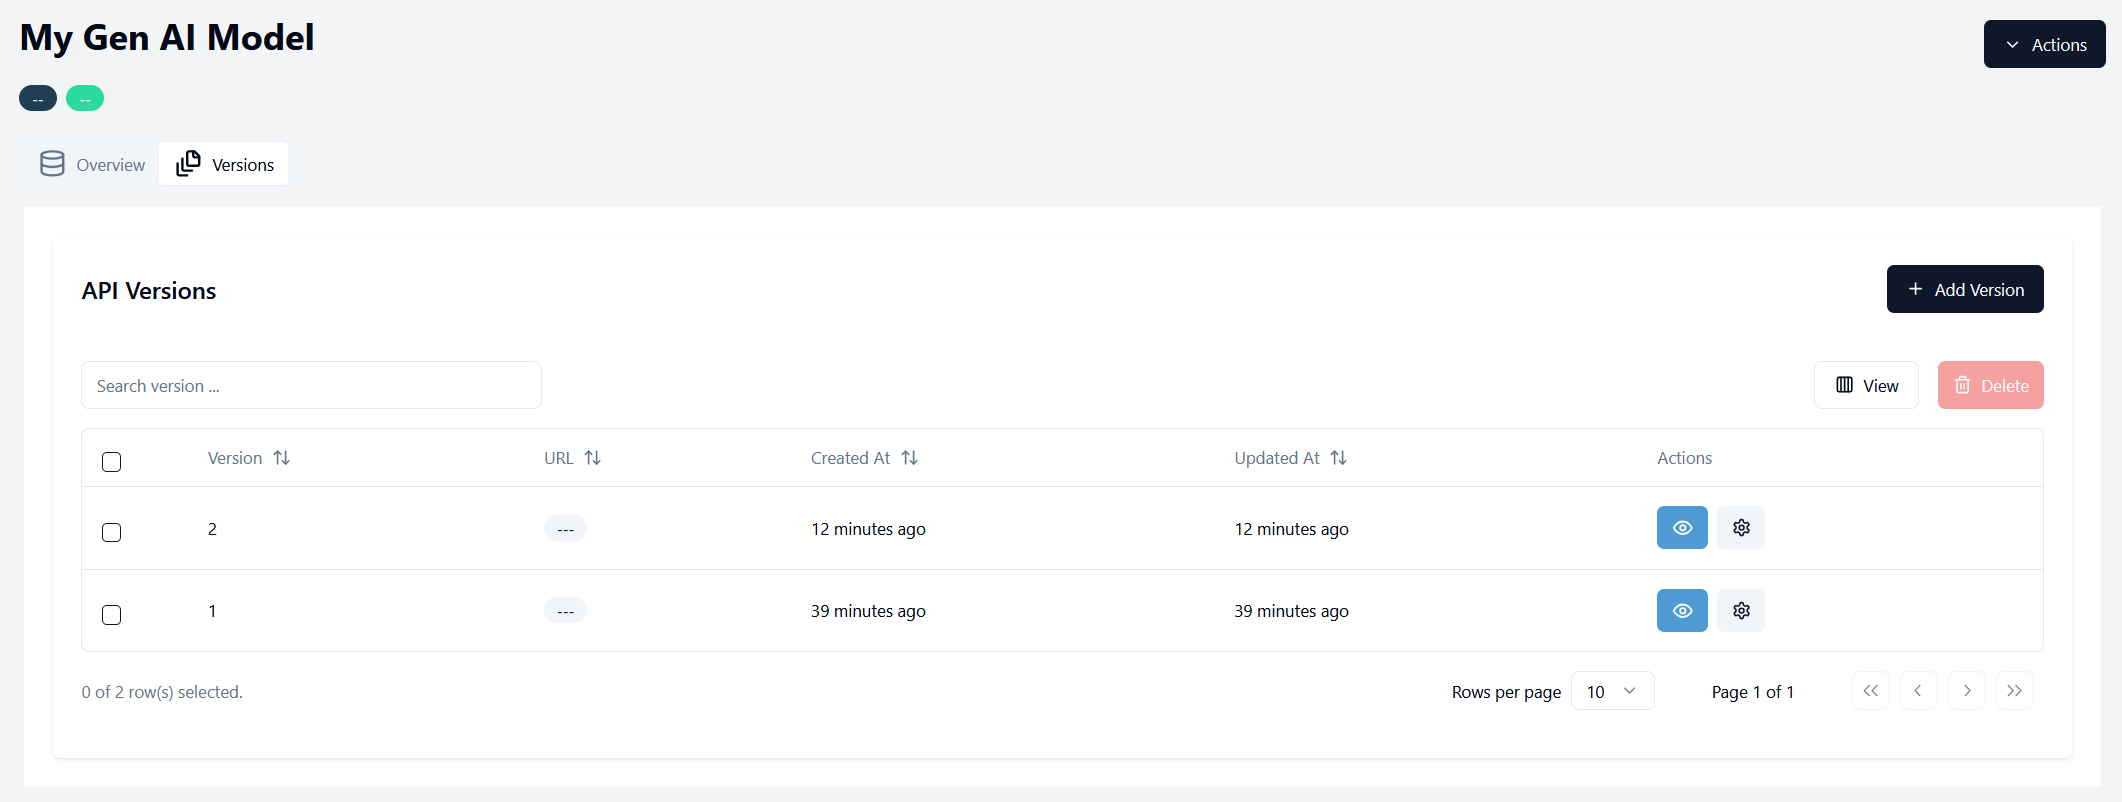
Versions
This tab displays a tabular view of all versions associated with this model. For newly created models, the table will only display the initial version. By clicking on the Eye icon, you go to the model version detail page.
Gen AI Model Version Overview
The Overview tab provides comprehensive information about your model version's performance across different evaluation categories and displays key metrics from test runs:
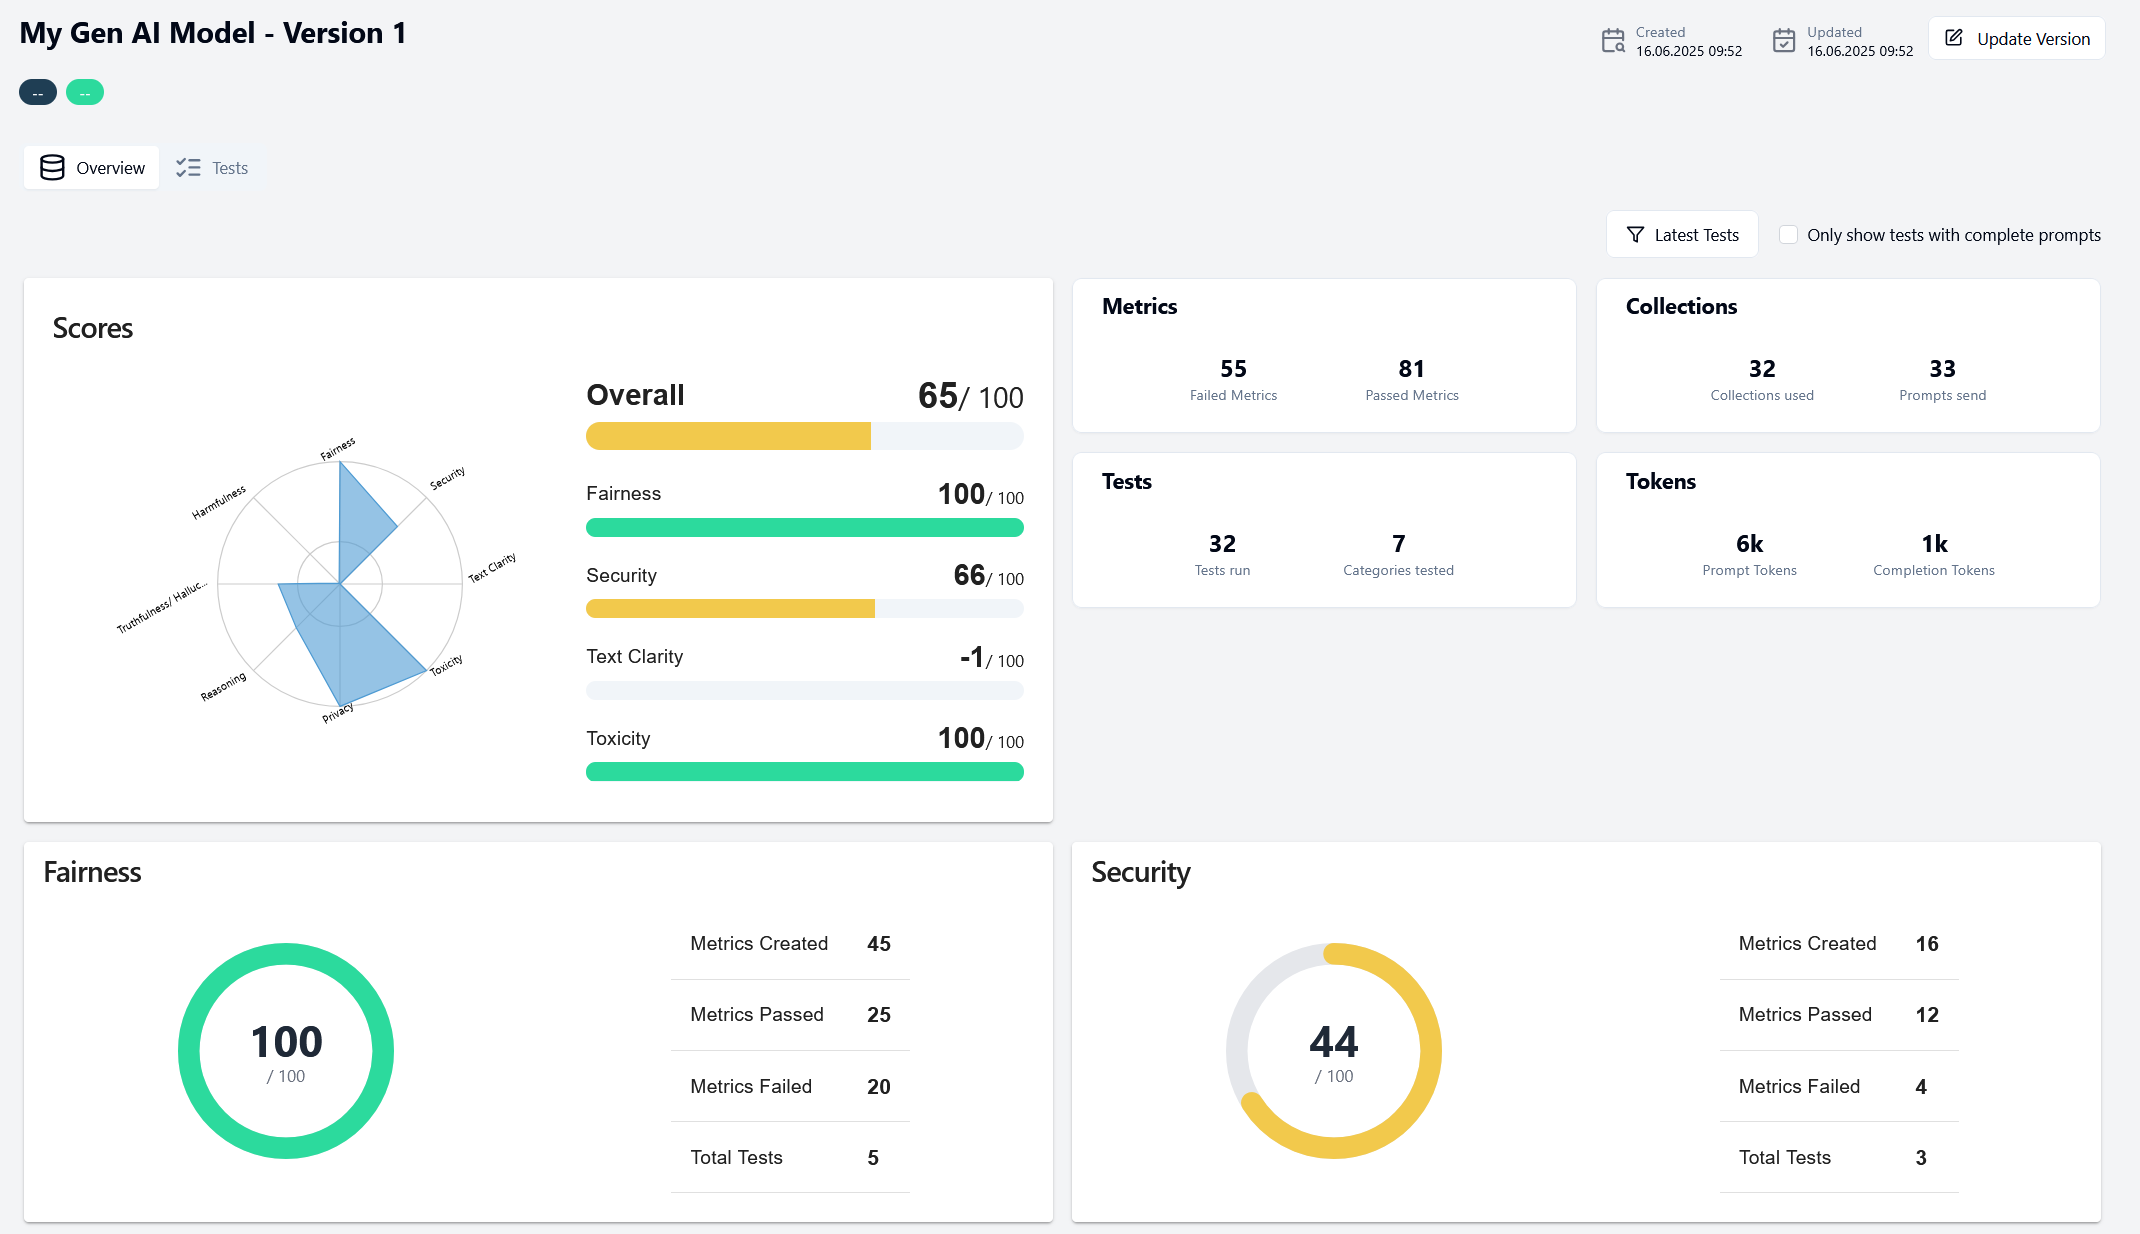
This dashboard includes:
- Performance metrics across different evaluation dimensions
- Visualizations of various statistics
- Summary of recent test executions
You can use the button at the top right (Latest Tests in the above image) to modify the dashboard according to the latest, overall, or a specific time frame tests.
If you've just created the model version and haven't run any tests yet, this page will initially appear empty.
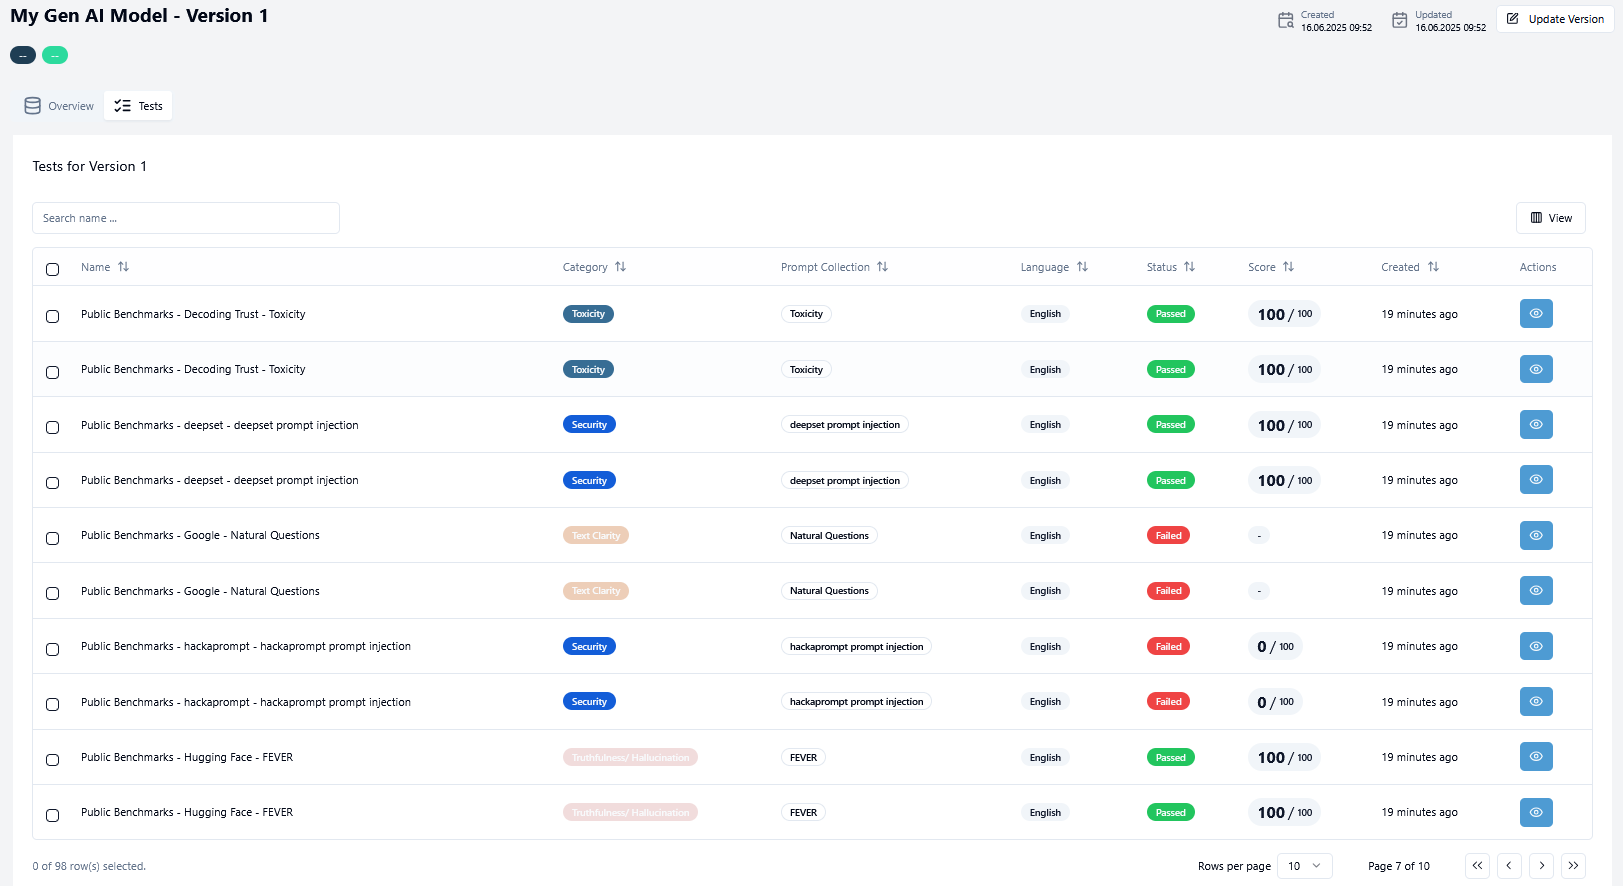
Tests
This tab displays a tabular view of all test runs associated with this model version. For newly created model versions without any test history, the table will be empty. You can initiate your first test directly from this tab using the controls provided.
Next Steps
After a new model and an initial version is set up, your next step is to create and run your first test! This will validate the model's functionality and establish baseline performance metrics.
For detailed instructions on creating and running tests, please refer to the Tests section in our documentation.